Google Keyword Planner is a good free source of keyword ideas, but the file it gives you is built for advertisers, not for someone planning blog posts. A typical Keyword Planner export arrives with report details above the data, a dozen or more columns of bids and monthly figures, and plenty of keywords you’ll never write about. This guide shows you how to turn that file into a clean, sorted list you can actually use.
Filter before you download
The quickest clean-up is the one you do before the file exists. Keyword Planner has its own filters above the keyword ideas table. Use ‘Refine keywords’ to switch off brands and other groups you don’t need, then add a filter that excludes keywords containing obvious junk, such as ‘jobs’, ‘salary’ or a competitor’s name. Google’s own guide to using Keyword Planner shows where these settings sit.
Every keyword you remove here is one you don’t have to remove later. When you’re ready, click ‘Download keyword ideas’ and choose either CSV or Google Sheets.
What’s in a Keyword Planner export
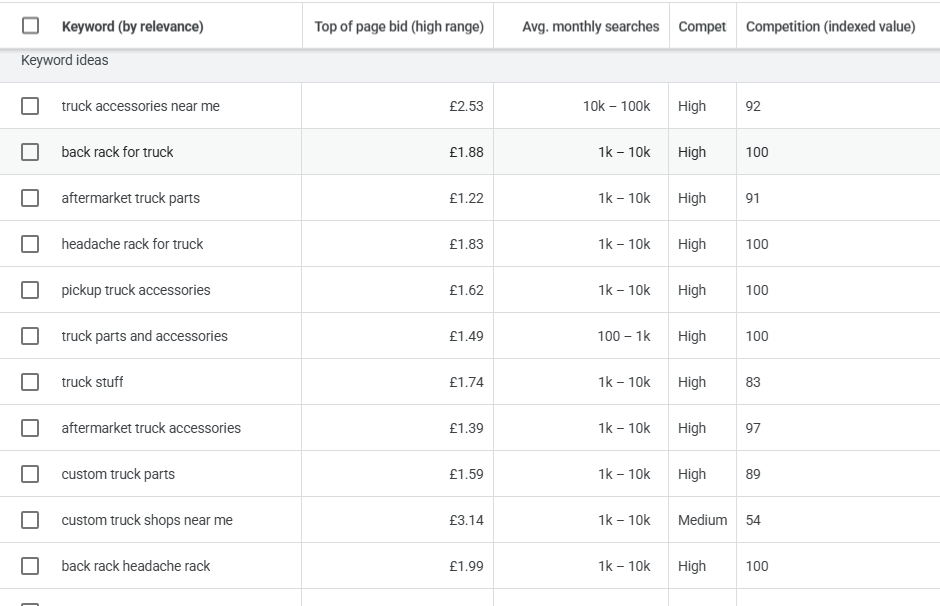
Open the file and the first two lines are report details: the report name, with the date and time you downloaded it, and the date range the figures cover. The column headings start on line three. Below them, each keyword gets its own row, with these columns:
- Keyword: the only column this guide really cares about
- Currency: the currency your bid figures are in
- Avg. monthly searches: Google’s estimate of search volume
- Three month change and YoY change: how demand has moved recently
- Competition and Competition (indexed value): how many advertisers bid on the keyword, as a label and as a score from 0 to 100. This is about ads, not about how hard it is to rank.
- Top of page bid, low and high range: what advertisers pay per click
- Impression share, organic position, ‘In account?’ and ‘In plan?’ columns, which are usually blank unless you run campaigns
- A Searches column for each month in the date range, which can also come out empty
If your Google Ads account isn’t running any campaigns, Keyword Planner shows search volume as broad ranges, and the downloaded file swaps each range for a single round number. A keyword shown on screen as ’10 – 100′ appears in the file as 50, ‘100 – 1k’ becomes 500, and ‘1k – 10k’ becomes 5000. They look exact, but they aren’t. Treat 5000 as ‘somewhere between 1,000 and 10,000’, which is still enough to tell a busy keyword from a quiet one.
Opening the file without garbled text
If you chose Google Sheets, the export opens in your Google Drive and you can skip this section. The CSV option has a quirk: despite the name, the file isn’t separated by commas. It’s separated by tabs and saved in an encoding called UTF-16, which some programs don’t expect.
If Excel shows everything crammed into column A, or turns symbols into nonsense, don’t double-click the file. Instead, open a blank workbook, use Data, then From Text/CSV, and choose Tab as the delimiter and a Unicode file origin. Google Sheets is a free fallback: upload the CSV with File, then Import, and it sorts out the columns on its own.
Step 1: Decide which columns you need
Most of a Keyword Planner export is advertising data. For SEO planning, the bid columns and the monthly breakdown rarely earn their place, so delete them. That leaves you with two realistic options.
You only need the keywords. Copy the Keyword column, without its heading, and work on it as a plain list. This is the fastest route, and it’s the one the rest of this guide follows.
You want to keep search volume. Keep the Keyword and Avg. monthly searches columns side by side and do your filtering in the spreadsheet, using its built-in filter, so the numbers stay attached to the right keywords. A plain-list tool can’t keep two columns together, so if volume matters to how you’ll prioritise, this is the honest choice.
There’s a middle road too. Clean the keyword list on its own, then bring the volumes back with XLOOKUP, which both Excel and Google Sheets have, matching each clean keyword against the original file. Any keyword you changed during cleaning won’t find a match, which is a handy way to see exactly what you altered.
Step 2: Filter out keywords you’ll never target
Keyword Planner is generous with ideas, and plenty of them won’t suit your site. Read down the list and look for repeating words that mark a whole group of keywords as irrelevant. For a site about home composting, for example, typical candidates are:
- Brand names you don’t review or sell, such as a specific bin manufacturer
- Places you don’t serve, like ‘compost delivery leeds’ when you’re not a local business
- Job and money searches, such as ‘composting jobs’ or ‘compost business salary’
- Commercial terms that don’t fit an information site, such as ‘wholesale’ or ‘bulk’
Removing them one at a time is slow. Removing every line that contains a given word is quick, and that’s exactly what a filter does.
Step 3: Clean up stray characters in your Keyword Planner export
Keyword Planner data is fairly tidy, but lists still pick up odd characters, especially after a spreadsheet or a second tool has handled them. Look for:
- Spaces at the start or end of a line, which you can’t see but which stop two identical keywords matching
- Stray punctuation, such as quotation marks or square brackets, which turn up when a list has been through a Google Ads campaign
- Accented letters, as in ‘café’ or ‘crème brûlée’
Be careful with automatic symbol stripping, though. Most tools treat apostrophes, hyphens and accented letters as symbols, so ‘men’s boots’, ‘e-bike’ and ‘café’ can all come out changed. If your list contains words where those characters matter, trim the spaces first and check the rest by eye.
Step 4: Standardise the case
Keyword Planner’s own suggestions are almost always lowercase. However, once you combine them with lists from other sources you’ll get a mix: ‘Compost Bin’, ‘compost bin’ and ‘COMPOST BIN’. To a spreadsheet, those are three different keywords. Converting everything to lowercase makes them identical, which makes the next step possible.
Step 5: Check for duplicates
A single export rarely contains exact duplicates. The trouble starts when you run Keyword Planner several times with different seed keywords and stitch the files together, because the same suggestions turn up again and again.
The simplest fix is in the spreadsheet. Put your list in one column, select it, and use Data, then Remove Duplicates in Excel, or Data, then Data cleanup, then Remove duplicates in Google Sheets. Do this after Steps 3 and 4, otherwise ‘compost bin’ and ‘Compost bin ‘ with a trailing space survive as two separate entries.
Step 6: Sort the list alphabetically
Sorting A to Z puts similar keywords next to each other, so problems are easy to spot. Near-duplicates such as ‘compost bin’ and ‘compost bins’ sit together, and you can decide whether they belong in the same post. Junk that slipped through the filter also stands out, because it breaks the pattern of the lines around it.
Read the sorted list from top to bottom once. It’s the quickest quality check there is.
Cleaning a Keyword Planner export in Keyword Scrubber
You can do Steps 2, 3, 4 and 6 in a spreadsheet, but it’s fiddly work with formulas and menus. Keyword Scrubber is a free tool that does them in a few clicks. It runs entirely in your browser, so your keyword list is never uploaded anywhere.
Once you’ve copied the Keyword column from your export:
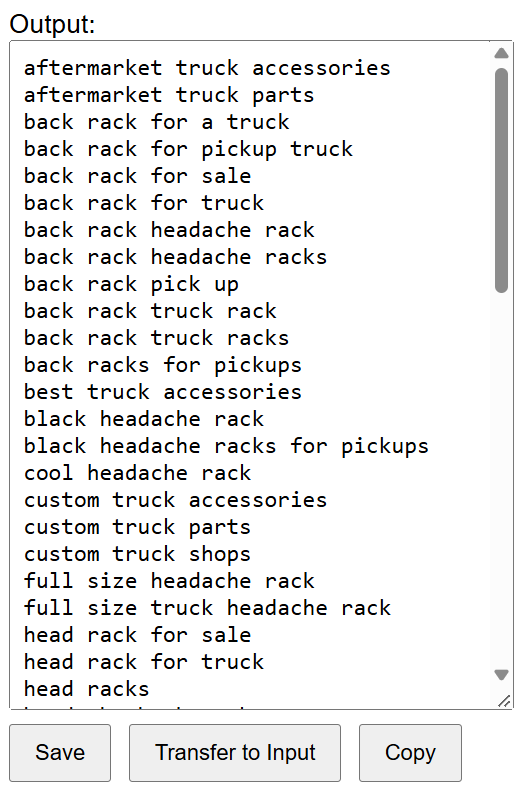
- Click Paste to put the list in the Input box.
- Open Filter, type a word you want rid of, such as ‘jobs’, and click Exclude lines containing filter. Then click Transfer to Input and repeat for each word on your list.
- Open Character Cleanup, click Remove leading and trailing spaces, then Transfer to Input.
- Open Change Case, click lowercase, then Transfer to Input.
- Open Sort and click Sort A-Z.
- Click Copy to put the clean list on your clipboard, or Save to download it as a text file.
Two things are worth knowing. First, the filter matches anywhere in a line, so excluding ‘ash’ to drop wood ash keywords would also remove ‘wash’ and ‘cash’. Second, the free edition doesn’t remove duplicates, so if you’ve merged several exports, paste the result into a spreadsheet for Step 5.
If you merge exports regularly, that duplicate step soon becomes the slowest part of the job. The full version of Keyword Scrubber removes duplicates for you, and it also strips the header rows and extra columns, so a raw export can go straight in. It runs on your own computer and works offline. The Keyword Scrubber user guide covers every button in the free edition, along with what the full version adds.
What to do with your clean list
A clean, sorted list is ready for the real work: grouping keywords that belong in the same post, picking the main keyword for each group, and deciding which posts to write first. If you kept search volume, now’s the time to bring it back in and use it to prioritise.
Either way, you’re now working from a list of keywords you’d actually target, not a spreadsheet of advertising data. Next time you download keyword ideas, open Keyword Scrubber in another tab and work through the steps above. It’s free, there’s nothing to install, and your list never leaves your browser.